Earl Heath Miller Jr. (born October 22, 1982) is a former American football tight end…

This is bronze artist extraordinaire, Don Hershberger. Don is 55 years old when I painted him in 2008. He lives in nearby, Clark, Wyoming. Don has lived the lived of a cowboy here in Wyoming for many, many years but he has always found the time to create. His bronze work consists of cowboys, horses, Native Americans and wild animals from the area. One other interesting fact about Don is that he is a cowboy preacher.
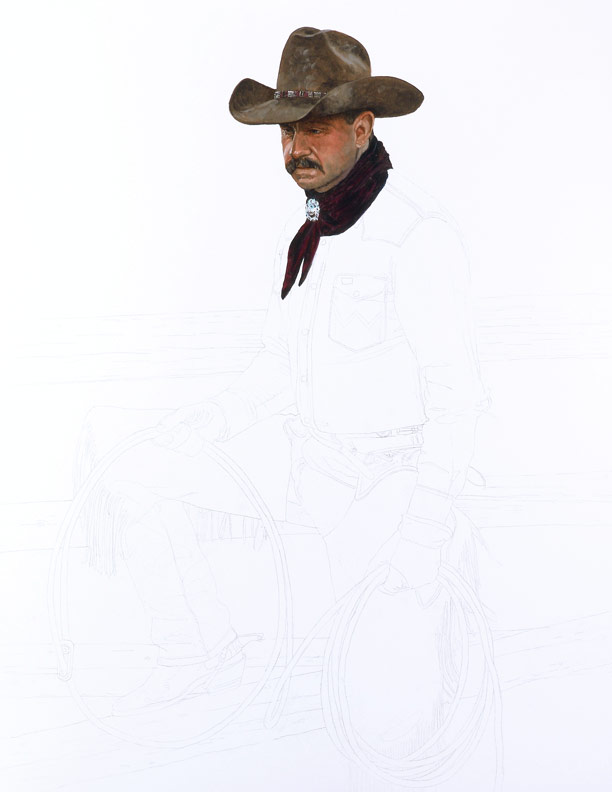
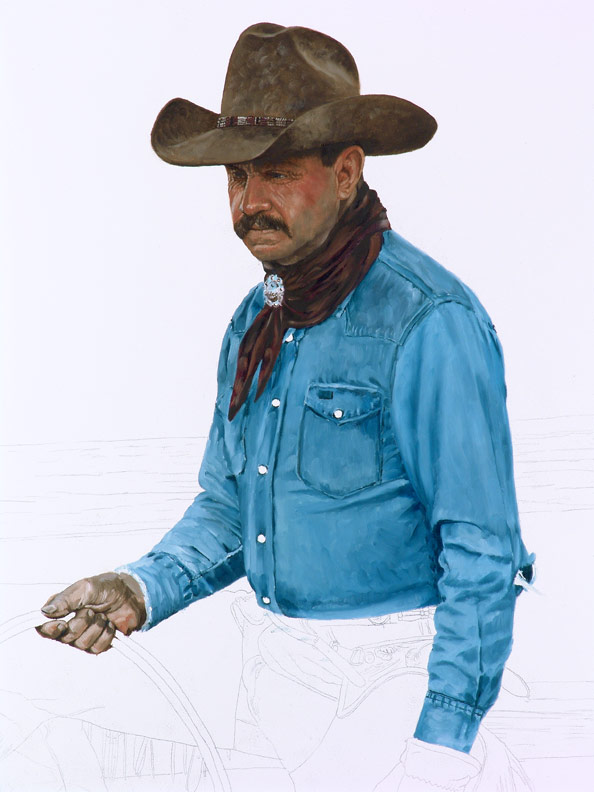
Here is day one. I posed Don on his ranch in Clark. He is holding his favorite lasso, leaning against his classic buck rail fence. The piece is traditional oils on Ampersand, Gessobord Masonite. The overall size is 18″ x 24″.
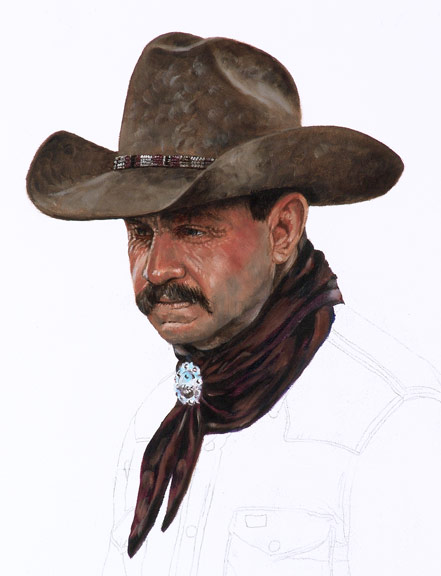
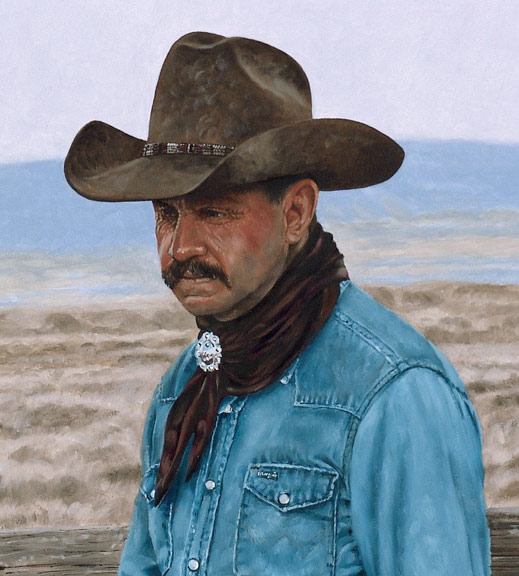
Here is a close-up of his face.
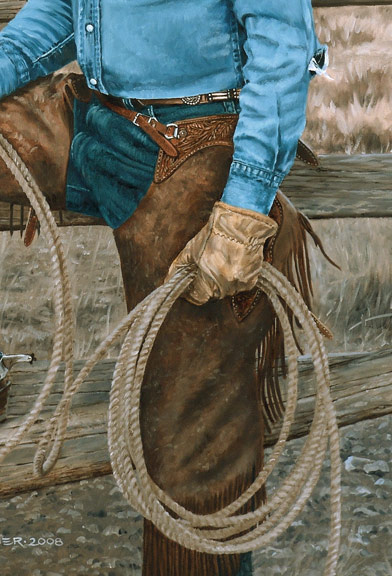
Here is day two’s work. The hand and shirt are still pretty rough. These are two items that I have to let set up over night then work all the detail on top the next day.
I spent most of the day detailing Don’s shirt and hand and I am still not quite done. There is still quite a bit of detailing to do once the paint dries more, stitches, highlights and so on.
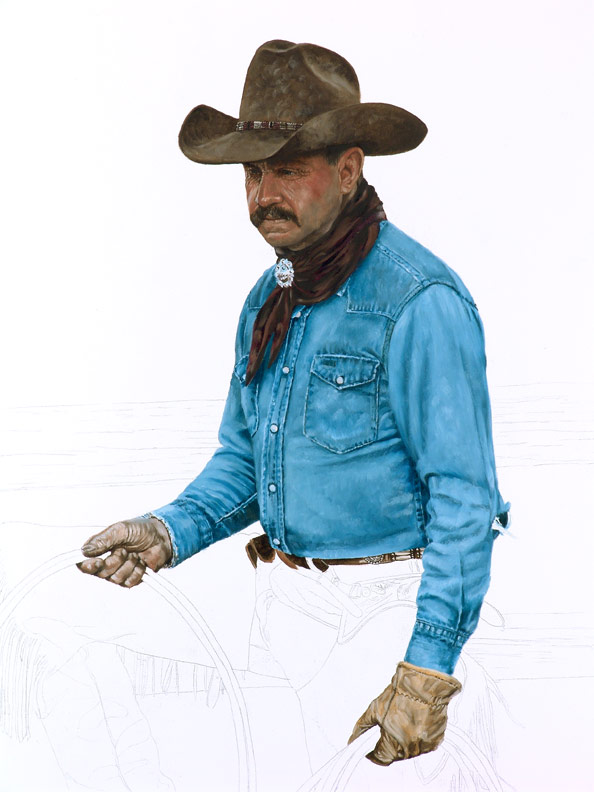
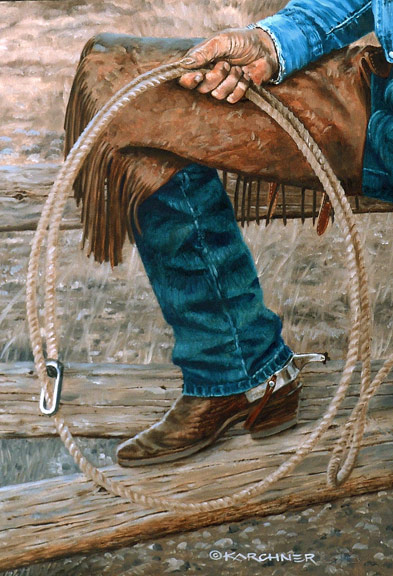
Day four. I have roughed in his right leg, chaps and his boot.
I have had many people ask why I paint the subject first. I do find it is much easier for me to do it this way. Is this normal? I bet it is probably not. Most artists probably work the other way around and leave a hole for the subject. I am not normal and I don’t do things the way most do. I did try this before and I ended up putting marks in that background and had to redo a lot of it. I paint pretty fast, so almost all of my oil paint is still pretty wet as I work. I am very inpatient and won’t wait for paint to dry before continuing on. My main concern is the subject. I am a portrait artist, not much of a landscape artist. I want the subject just right and perfect first and foremost before doing that background. By putting in the background last also helps me to get the right contrast and detail I want in that background. I might go lighter, darker, more contrast then my reference photograph. Having the subject done first, helps me to make the right call.
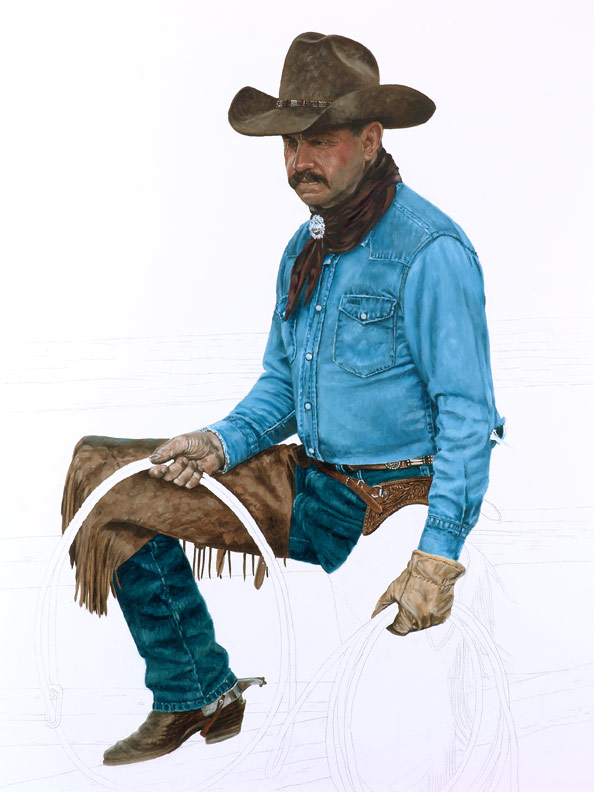
Here I roughed in his left leg and chaps. I then detailed his chaps on his right leg and his boot. The background is next.
I have got the background started. It is still pretty rough, same with the wood rail. I should be able to smooth all that out with a dry brush the next day and finish all the detail in the wood. One thing that I forgot to mention was that we photographed Don just after the sun went behind the famous Bear Tooth Mountains behind us. It just gave the sky a slight pink hue and the mountains in the background such a great blue color. If everything goes well, I should have the background and the buck rail fence roughed in next.
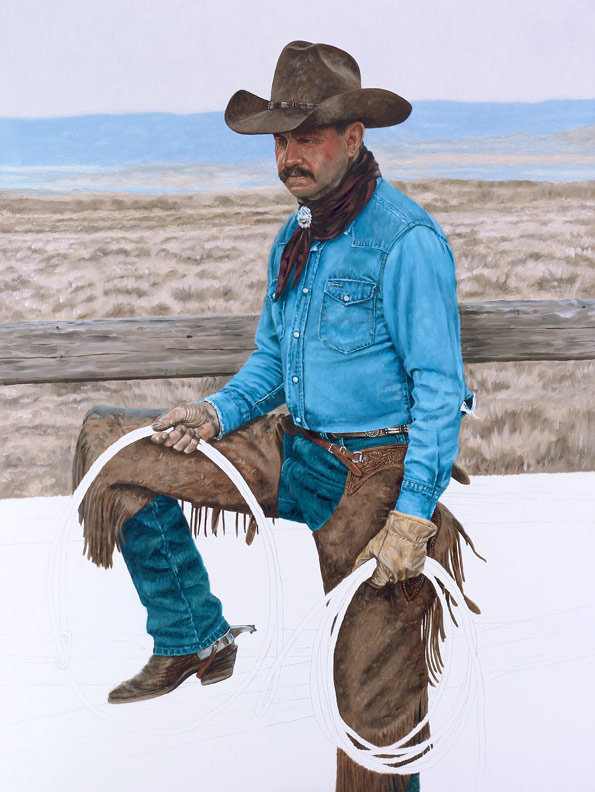
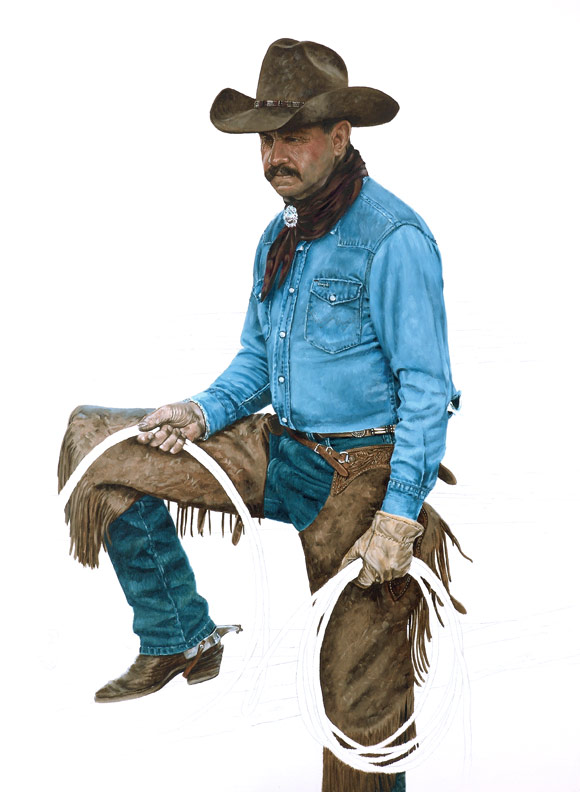
I have the background all roughed in. Now you can see why his foot was at an odd angle. Each section of the buck rail fence has its own brace. That is what Don’s foot is resting on. I detailed Don’s chaps on his left leg. There is still quite a bit of detail on the wood. It will also take a while to smooth all the edges on Don. No matter how careful you are, you still get a little paint on him where the background bumps up to him. For me, it is still easier painting the subject first. Lasso and detailing are next.
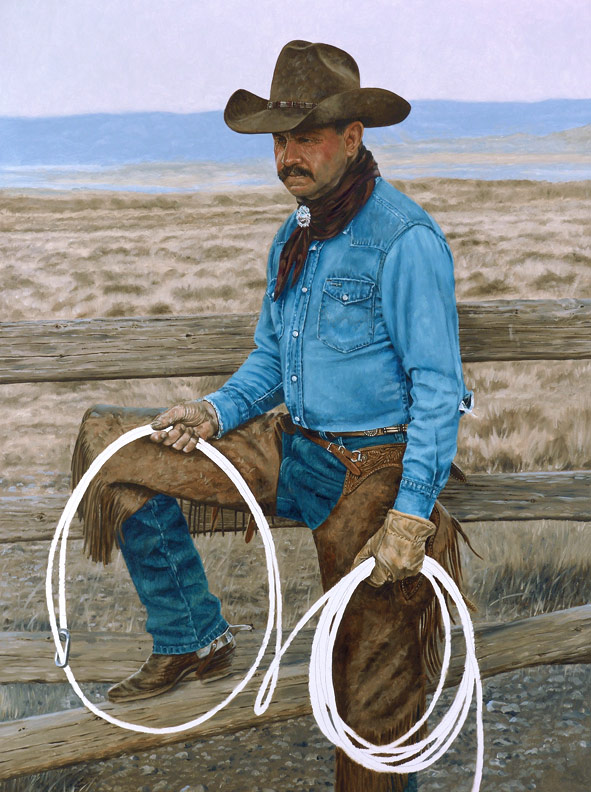
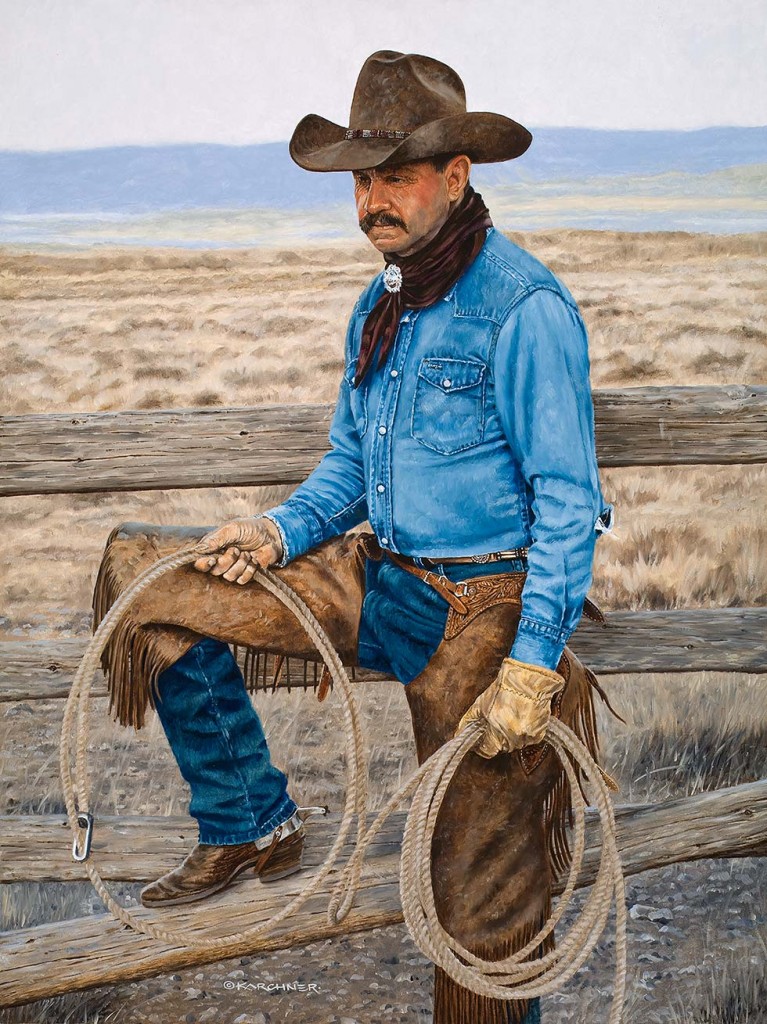
Here is the final. The lasso actually took me two days to complete. I had to rough in the texture, let it set up over night and I finished detailing it the second day. I added more detail to the buck rail and several other places as well.
Here are some close ups.
Thanks for riding along. Stay tuned, there are many more of my works in progress to come.
Denny
Related Posts